FAQ
Cautious ! this guide was written long time ago and only concern bikes fitted with marelli ecu ( bikes made before 2010 )
If your bike is newer , please read the forum for updated informations
Q : What cable to buy ?
 A: KKl
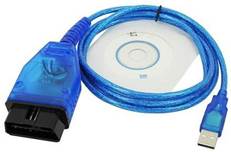
cable can be found on ebay/amazon ;
keywords are VAGCOM OBD KKL USB 409.1
A: KKl
cable can be found on ebay/amazon ;
keywords are VAGCOM OBD KKL USB 409.1
It has a blue led, and case is crystal blue as the picture
 Q: Where to find cable drivers
A: there is typically 2 kinds of cable
Winchiphead chipset(WCH)
and ftdi chipset
ftdi cable has led that switch ON when cable is connected to battery
 wch cable has a red led that switch on when cable
is connected to usb
wch cable has a red led that switch on when cable
is connected to usb
=> be carefull about gnd
link it don’t match with WCH obd adapter, you need to
link 4 & 5 together!
Q: My bike
hasn’t 16pin female OBD connector
A: you need
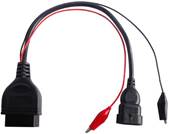
to buy a 2nd cable that will convert 16 pin
connector into 3 pin kkl connector
Keywords on ebay/amazon are fiat OBD
Q: My fiat
adapter don’t have black croco
A: it works
too! The only difference is your ecu will need to
supply power to obd interface
Be sure your OBD interface is working fine before plug it to the bike.
Q: Is my
bike compatible?
A: JPDiag is compatible with all bike using 59m, 5A, 5S ecu
Q: Is it
safe to plug it to my bike
A: if you
invert red and black croco you may destroy your ecu. Symptom are , err in temp
sensor , and fan still on. TPS isnot working good too
To ensure your cable are working, always run testcable
from JPDiag with your both cable connected to
computer and battery , but not connected to diagnostic
plug.
If test is successful, then connect cable to diagnose outlet
, switch on ignition , and click on connect from JPDiag
main window
Q: I didn’t
pay attention to croco , I plug it the wrong way ,
now my bike fan are still on , what to do ?
A: Replace
your ecu ,
or make a link between battery gnd and middle pin of diagnose
outlet on the bike.
Q: I get
nothing displayed on computer when i click on connect.
A:
1) Connect button stay red
Check if your com port is not already in use
2) Connect button is green
Be sure you are connected to the right outlet on bike.
Check
in device manager what is the com port number used by
your cable. Report this number in the field close to the connect button.
ð
Click connect within 5s after switch on ignition
ð
Try to init ecu in slow init mode instead
fast init
Q: Button
is missing for reset maintenance counter, resetting TPS or adjusting CO.
A: Register
for a free license here
All ecu data collected will be available to all
, to find what ecu / software is used on what
bike ..
Q: When I
start engine , software is frozen
A: When
engine is running , there is a lot of noise on wires.
You need to add filters on USB line to avoid PC to hang up.
You can insert on USB a single HUB , most of
them have usb lines filtered
Q: I want register several
bikes
A: you can
ask up to 5 bike for free, if you need more get in touch with me
If you still have problem to initiate connection ,
read the good FAQ made by users:
By DropLock
I found
many of the questions I had along the way answered here but some of it was
confusing so I thought I'd put together another users guide to help out a
bit. To begin with I'd like to thank jpl for his
fantastic work and support and may I suggest if you find JPDiag
useful and you're in a position to, that you show your appreciation by way of a
donation for providing this excellent program for FREE!!!.
Please do the right thing as it seems someone has already ripped it off to some
extent and is selling it on ebay (Poor Form!!). Also
a thank you to the following members: chrisw, iang27
and wayne111 and tonered from ducati.ms as I have utilised extracts and or advice from their various posts to
pull this together.
JPDiag will allow users to do a number of things in it's basic form however it is possible to add further
functionality for a small fee just contact jpl for
further information.
jpl has also created courroies, which is a belt tensioning program.
You'll need to purchase two cables these are:
1.) VAG-COM KKL 409.1 OBD2
2.) Fiat 3pin Alfa Lancia to 16 Pin Diagnostic
Adaptor Cable OBD2 002 http://www.ebay.com.au/itm/251023149936?ssPageName=STRK:MEWNX:IT&_trksi…
At some point these links will expire so the sellers
name is "verymech"
(http://myworld.ebay.com.au/verymech/?_trksid=p4340.l2559). I sent a note with
payment suggesting he send both cable together, which he did, and as stated on
his auctions he doesn't charge for post. I can recommend this seller. The VAG
cable comes with its own driver - ignore it and download this driver.
Driver Download: works for XP, VISTA and Win7
http://www.ftdichip.com/Drivers/CDM/CDM20824_Setup.exe
!!!! IMPORTANT !!!! --> INSTALL THE DRIVER BEFORE
CONNECTING YOUR CABLES !!!
Once you've downloaded JPD you'll need to unzip it to whatever folder you want
(I didn't need any special program, Vista managed it). From what I recall there
was a few steps and being in French I didn't understand everything it was
proposing however I believe the 1st screen ask you to close all running apps,
the 2nd screen asks you where you want to install JPD. There's also is a
donation request, a note here, once JPDiag is opened
you'll also find there's a button facility to initiate a donation, it's
permanently in the program so you can do it at any time. I think I went in
circles a bit but generally I stayed away from the quitter or something
similarly named and the Oui is of course
"yes" so click it.
As you launch JPDiag you will be
presented with a screen displaying 3 picture options of your cable setup.
Choose which one corresponds with yours when the time comes.
There's discussion of this forum due to concerns that some Alpha cables may be
sleeved incorrectly i.e. that the positive lead is sleeved black and the
negative red. I can confirm the lead I purchased is operating safely.
To be safe check yours before you connect to anything at all by doing a
resistance check with a multimeter:
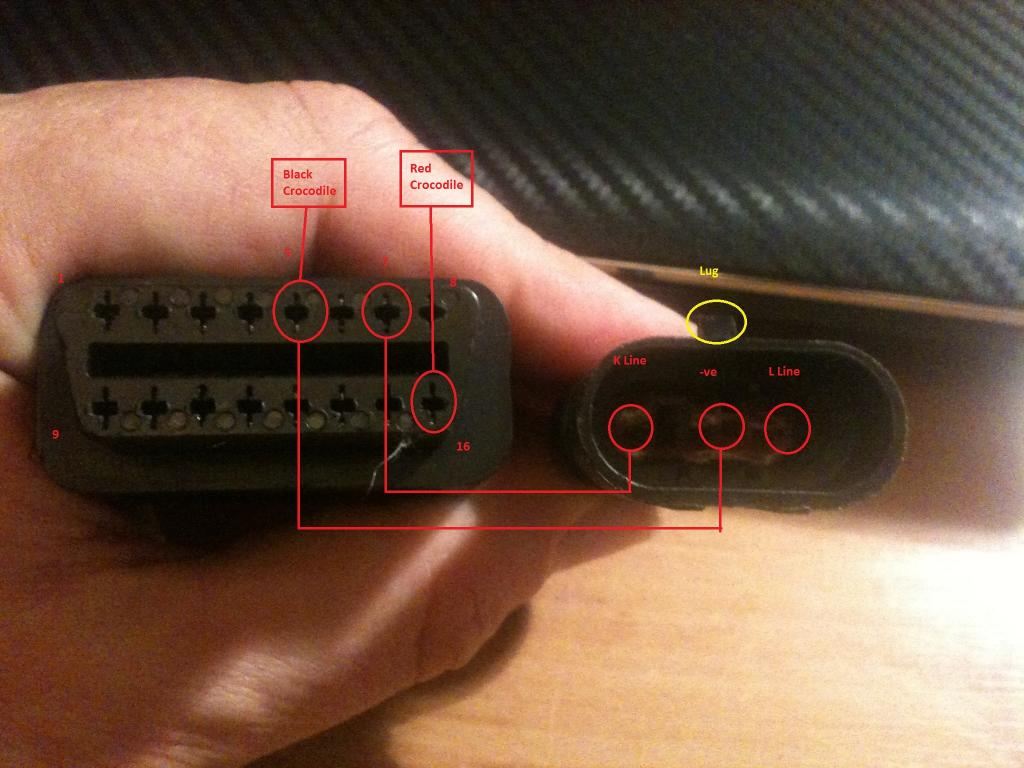
You'll see at the linked page below a picture identifying the operating pins on
the OBD cable. The pin you need to check is #16, it is positive power so set
your mm to ohms and connect one probe to pin 16 and
the other to the red alligator clip. Now since the pinout
image on that page is of the OBD cable you need to translate that to the female
recepticle of your Fiat cable. I simply inserted a
largish sewing needle into the corresponding female pin hole and connected the
mm probe to it to check continuity. Check your
negative while you're there too if you like, it's pin #5. Pin #7 is the K line
which you needn't concern yourself with.
Pinout Picture and JPDiag
instructions at Desmodromico:
http://www.desmodromico.com/public/index.php?option=com_content&view=ar…
That's your polarity check sorted. DO THIS BEFORE YOU
CONNECT UP TO ANYTHING !!!
At this point you should have installed the correct driver and JPDiag.
Before launching JPDiag I connected my cables up -
1. Join the OBD and Fiat cables together and plug them into the usb of your computer.
2. Check in Device Manager under Ports which COM port the cables are using.
I've seen here where people suggest using some number 10 or below but I'm using
Vista and it came up as 12 and seems to be fine. You will need to know the port
number in case it needs correcting in DD. DO THIS BEFORE CONNECTING TO YOUR
ECU. If you select the device listed under ports and right click, go to
properties and in the drivers tab you can check to make sure it's operating
with the right driver which should be
3. Connect red alligator to pos battery and black to
either neg battery or a good earth on your
bike.
4. At this stage a little blue LED came on in the OBD cable. I don't know if
all manufacturers had this facility.
5. Launch DD and select your cables.
6. Once the program interface opens you'll see a connect button alongside a
field into which you'll need to enter what COM port you're using.
7. Check the ini field setting - IAW59M use 'slow ini' IAW5AM use 'fast ini'
8. At this stage you can do another test on your cables. Set your mm to 20v and
do as.
Click Cable Test -
Connect the +ve and -ve fly
leads to a 12v power supply e.g. your bike battery but do not connect the
diagnostic plug. Set your mutimeter to 20v and
connect the +ve lead on the meter to the single outer
pin in the Fiat Adaptor. It should look like this - | - -. Connect the -ve lead from the meter to the middle pin or the -ve terminal on the power supply.
Click on the connect button and the KLine 12v and KLine 0v tabs should become selectable
Your meter will read in excess of 12v straight away.
If you have the correct com port you will be able to click on the KLine 0v and the voltage on your meter will drop to 0.3v.
Click on the KLine 12v and the meter will read over
12v.
If you don't get this behaviour then the KLine is not working so check your setting (probably Com
Port)
9. Now if everything to this point is in order go ahead and connect your Alfa
lead up to your ECU.
10. Click the connect button which is near the port # field and you will see on
the screen "connecting", I waited a little while then turned the
ignition key on and like magic on the left hand side in JPD you'll see the basic ECU data. Copy it and
post it in the request License form and you'll get a message back
from jpl which will include licence
file. This cle.lic file then needs to
be copied into the JPDiag directory
.
This is as far as I have come in my journey, it's the process
I used successfully but do further reading or speak to your mechanic if you're
not sure what you're doing. I hope this helps.
Gathered from other members posts:
If you are still having problems try using this utility to remove the
http://www.ftdichip.com/Support/Utilities/CDMUninstaller_v1.4.zip
Instructions http://www.ftdichip.com/Support/Utilities/CDM_Uninst_GUI_Readme.html
Then reinstall using http://www.ftdichip.com/Drivers/CDM/CDM20824_Setup.exe
Don't plug the lead in until you have run the driver exe file.
Here's another nice utility for changing the com port http://www.ftdichip.com/Support/Utilities/Reassign%20COMNo%20Utility.zip
Instructions http://www.ftdichip.com/Support/Documents/AppNotes/AN_160_COMPort_Assigment_User_Guide.pdf
Some of the common problems we come across with connection are:
Plugging the KKL lead into the computer before installing the drivers causing
the default drivers to be installed
Using the drivers supplied with the KKL lead
Not installing the
Wrong com port setting (use device manager to identify) then change the value
in JPDiag
Using newer combined KKL/CAN leads rather than just 409.1 Vag
Com KKL
Wrong ini setting - IAW59M use 'slow ini' IAW5AM use 'fast init'
Not having the ignition on when connecting
Poorly charged battery
Faulty KKL leads
By iang27:
I though
I would make a 'basic' guide in english
for those not sure what they need and how to use it.
If any 'expert' users want to add to this then
please do so with tips, advice etc.
Firstly
I bought,
This
http://www.ebay.co.uk/itm/2608335744...84.m1439.l2649
and
This,
http://www.ebay.co.uk/itm/180714968322
Other
cables are available but these ones work and the prices are good, took
about 3/4 days to arrive.
Then I
downloaded this JPDiag
from http://jpl250rs.perso.sfr.fr/download.php
The
only other thing you need is the com driver which is different for the various
operating systems but is available on the website, somewhere !
Here
is the one I used for xp, it work with vista /sevenn too
http://www.ftdichip.com/Drivers/CDM/CDM20814_Setup.exe
or
latest
http://www.ftdichip.com/Drivers/CDM/CDM20824_Setup.exe
Test your cable
1st
Launch
JPDiag and go in test sub menu
connect
cable to battery ,but not to bike loom.
if
test2 is ok , then you can follow
GETTING STARTED
1
Connect the blue cable to your laptop or pc via usb
2
Connect the 'fiat' cable to the blue cable and plug into the bikes diagnostic
plug and connect the + and - cables to battery
3
GO TO DEVICE MANAGER AND CHECK WHAT PORT YOU ARE USING -- VERY IMPORTANT
!! ( This port can change )
3 Launch JPDiag and go in test sub
menu
Use same com port as found in device manager
Connect cable to battery ,but not to bike loom.
If test2 is ok , then close application and follow the
rest of the process
4
Open JPDiag
and change the port number to whatever port you are using.
5 Click on connect and turn on ignition - You should
have your ecu information displayed.
6 Copy your ecu details in
full from the screen and post them in the License page
7 When you get your license by email,
download the file and copy into the JPDiag directory.
8 When you next
connect you will notice that the 'Service' and 'TPS' buttons are active, you
can now reset them.
9 I recommend that
you make a 'Dump' file of your standard map and save it to allow you
to reload it if ever needed.
The TPS needs to be reset on a CLOSED throttle
You can also check fan operation, fuel pump,
injectors, Co2 etc etc
MAKE SURE YOU KEEP CONNECTED AND DO NOT DISCONNECT
UNTIL YOU ARE INSTRUCTED TO TURN OFF IGNITION.
You may need to reset your dash to whatever region
you are located in, this can be done by holding down the left button while
turning on the ignition, go to the relevant section choose your
country and hold the switch down to save it, turn off ignition.
I 'think' that is about it for the basics, good luck !
*************************************************
How to setup Co by 916rs
Here
a short description how to set CO
You need:
1: a bike ![]()
2: JPDiag
3: Synchron Tester
4: Gas Analyser
5: Adapter to connect to the gas tester
Then do the following:
1: Start JPDiag
2: TPS Reset
3: Remove the CO plugs from the header and screw the adapter in.
4: Plug in the synchrontester at the intake
manifolds.
5: Start the bike and synchronize the butterflies at 3000rpm
with fully closed idle screws. At 2valve
with the screw in between the
the butterflies. At 4 valves with the connecting rod between the Butterflies.
6: Open the idle screws that the bike idle at 1100 rpm fully synchronized.
7: Warm the engine up to 40°. Up from that point Co adjustment works in JPDiag.
8: Then stuck the co-measurement tube to the adapter on the manifold from
horizontal cylinder
and read value
9: The same at vertical cylinder.
10: At this point you have luck or not
Is there a difference less then
0,3% it is ok
Is there more you have to remap your ECU for
good throttle response and gas assumption
11: Then you can change the value in JPDiag that
there are 4,5% on both cylinder.
12: That it was,you can
remove Gas tester and Synchron tester.
Now you have a well running bike at lower rpm
13: This works only with Lambda off
Fiat adapter wiring by chrisw